A common mistake people make in the print proofing area is rushing the paper selection without testing different types. Choosing the wrong paper can cause colors to look washed out or oversaturated, leading to mismatches in final prints. Ignoring environmental conditions and display calibration also skews color accuracy. These errors often result in costly reprints and dissatisfied clients. Stick around to discover how proper calibration, testing, and environment control can save your project.
Key Takeaways
- Rushing paper selection without testing can lead to color discrepancies and poor final results.
- Failing to calibrate monitors regularly causes mismatched digital proofs and printed colors.
- Ignoring environmental conditions during proofing can alter color perception and accuracy.
- Choosing inappropriate paper types affects ink absorption and overall color fidelity.
- Overlooking sample testing and proof review under proper lighting increases the risk of costly reprints.
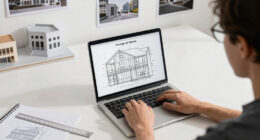
When preparing your print proof, overlooking common mistakes in the proofing area can lead to costly errors and delays. One of the biggest buying mistakes you might make is neglecting the importance of proper color calibration. If your monitor isn’t accurately calibrated, the colors you see on screen won’t match the printed result. This mismatch can cause you to approve proofs that look vibrant and correct digitally but turn out dull or off-color in print. Investing in a good calibration tool and taking the time to regularly calibrate your display ensures that what you see is truly representative of the final product. Without this step, you risk wasting time and money on reprints or, worse, delivering a product that doesn’t meet your expectations.
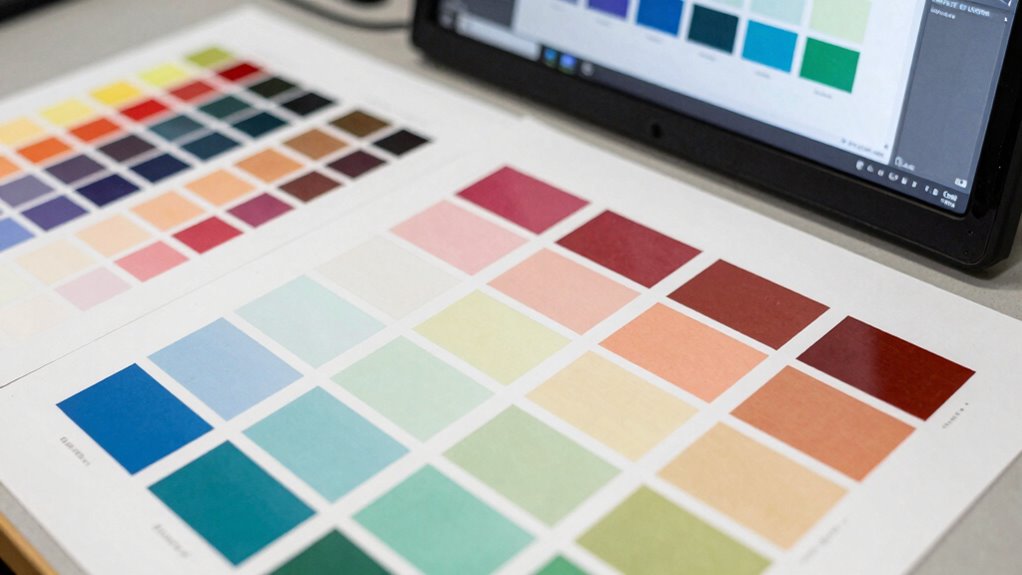
Another common mistake is rushing the paper selection process. Many assume that all paper types are interchangeable, but the choice of paper considerably impacts the final look and feel of your print. When you skip careful paper selection, you might end up with a finish that doesn’t suit your project’s needs—be it glossy, matte, textured, or smooth. This oversight can result in colors that appear washed out or overly saturated, or a texture that distracts from the overall design. By understanding the specific qualities of different papers and matching them to your project’s purpose, you can enhance color accuracy and ensure your proof aligns with your vision. Additionally, understanding how paper interacts with ink and color is crucial for achieving consistent results. Some papers absorb ink differently or reflect light in ways that alter how colors appear. If you don’t select the right paper for your project, even perfectly calibrated colors might not translate well in print. To avoid this, it’s best to request samples and test prints before finalizing your paper choice. This step helps confirm that your selected paper complements the inks and colors you intend to use, giving you a more reliable proof. Moreover, considering the environmental conditions during proofing, such as humidity and temperature, can also influence the final appearance and should not be overlooked. In addition, paying attention to lighting conditions during proof review can significantly impact your perception of color accuracy, as different lighting can make colors look differently than in natural or neutral settings.
monitor calibration tool for color accuracy
As an affiliate, we earn on qualifying purchases.
As an affiliate, we earn on qualifying purchases.
Frequently Asked Questions
How Can I Accurately Measure Print Proofing Area?
To accurately measure your print proofing area, start by checking your design specifications and using a ruler or measuring tape for precise dimensions. Make certain you account for margins and bleed areas, which affect color consistency. Selecting the right paper is essential, as different stocks can alter how colors appear. Double-check measurements before printing to avoid costly mistakes and guarantee the proofing area aligns perfectly with your project’s needs.
What Tools Improve Print Proofing Accuracy?
Think of your print proofing process as a finely tuned instrument. Using tools like a densitometer helps you measure ink density precisely, ensuring consistent color. A good paper stock aids in accurate proofing by reflecting true color and texture. Additionally, calibrated monitors and precise measurement tools help you avoid surprises, making your proofing process more reliable and ensuring your final print matches your vision perfectly.
How Does Color Calibration Affect Proofing?
Color calibration considerably impacts proofing by ensuring color consistency across your devices. When you use proper calibration techniques, you align your monitor and printer to display and reproduce colors accurately, reducing surprises in the final print. Without calibration, you risk mismatched colors and costly reprints. Regular calibration helps maintain reliable proofing, saving time and money, and guarantees your printed work matches your digital design precisely.
What’s the Best Way to Communicate Proofing Feedback?
Think of it as hitting two birds with one stone when you communicate proofing feedback. Be clear and specific, pointing out color inconsistencies and how paper selection impacts color accuracy. Use annotated images or digital proofs to illustrate your points vividly. Keep your feedback consistent and constructive, ensuring the printer understands your expectations for color consistency and paper quality. This way, you avoid surprises and keep the project on track.
How Often Should Print Proofing Areas Be Reviewed?
You should review your print proofing area regularly—at least once before starting a new project and during key production milestones. This guarantees print consistency and maintains quality assurance throughout the process. Frequent reviews help catch issues early, preventing costly mistakes and reprints. By staying proactive with your proofing checks, you ensure every print aligns with your standards, saving time and preserving the integrity of your final product.

Epson Standard Proofing Paper
Sheet Size: 17" x 100 ft
As an affiliate, we earn on qualifying purchases.
As an affiliate, we earn on qualifying purchases.
Conclusion
By avoiding common print proofing area mistakes, you guarantee your project’s success and maintain your reputation as a professional. Overlooking details or rushing through proofing can turn a great design into a nightmare of errors—like a small typo ruining an entire masterpiece. Stay vigilant, double-check everything, and treat your proofing process as if it’s the most important part of your project. Mastering this can elevate your work to legendary status in the print world.

Calibrite Display 123 Monitor Calibration Colorimeter for Photo Editing and Color Accurate Viewing, Easy 1 2 3 Software Workflow, USB C Connection, and Before and After Check, Supports 2 Displays
SPECIFICATIONS: Monitor calibration colorimeter with Easy 1 2 3 software workflow, USB C connection, compact body approx. 34mm…
As an affiliate, we earn on qualifying purchases.
As an affiliate, we earn on qualifying purchases.

Calibrite Grafilite Print Viewing Light Booth for Photo and Video Color Evaluation, 3 Color Temperature Modes 5000K 4000K 2700K, 95+ CRI Illumination, Includes Neutral Gray A4 Mat
SPECIFICATIONS: 3 color temperature modes 5000K 4000K 2700K with 3 level dimmer control, CRI 95+ professional illumination, includes…
As an affiliate, we earn on qualifying purchases.
As an affiliate, we earn on qualifying purchases.